
EXPORT XML
DAVINCI RESOLVE / SONY VEGAS
- Remove Silence, Fine-tune Cuts, and Export to Resolve.
- Multi-cam and Multi-track Audio is Supported
NEW: If you export to Resolve use the Integration instead of XML!
TimeBolt's Resolve integration makes it easier to cut multi track footage and links the tracks.
GET HERE
*To save and export requires a paid account.*
1
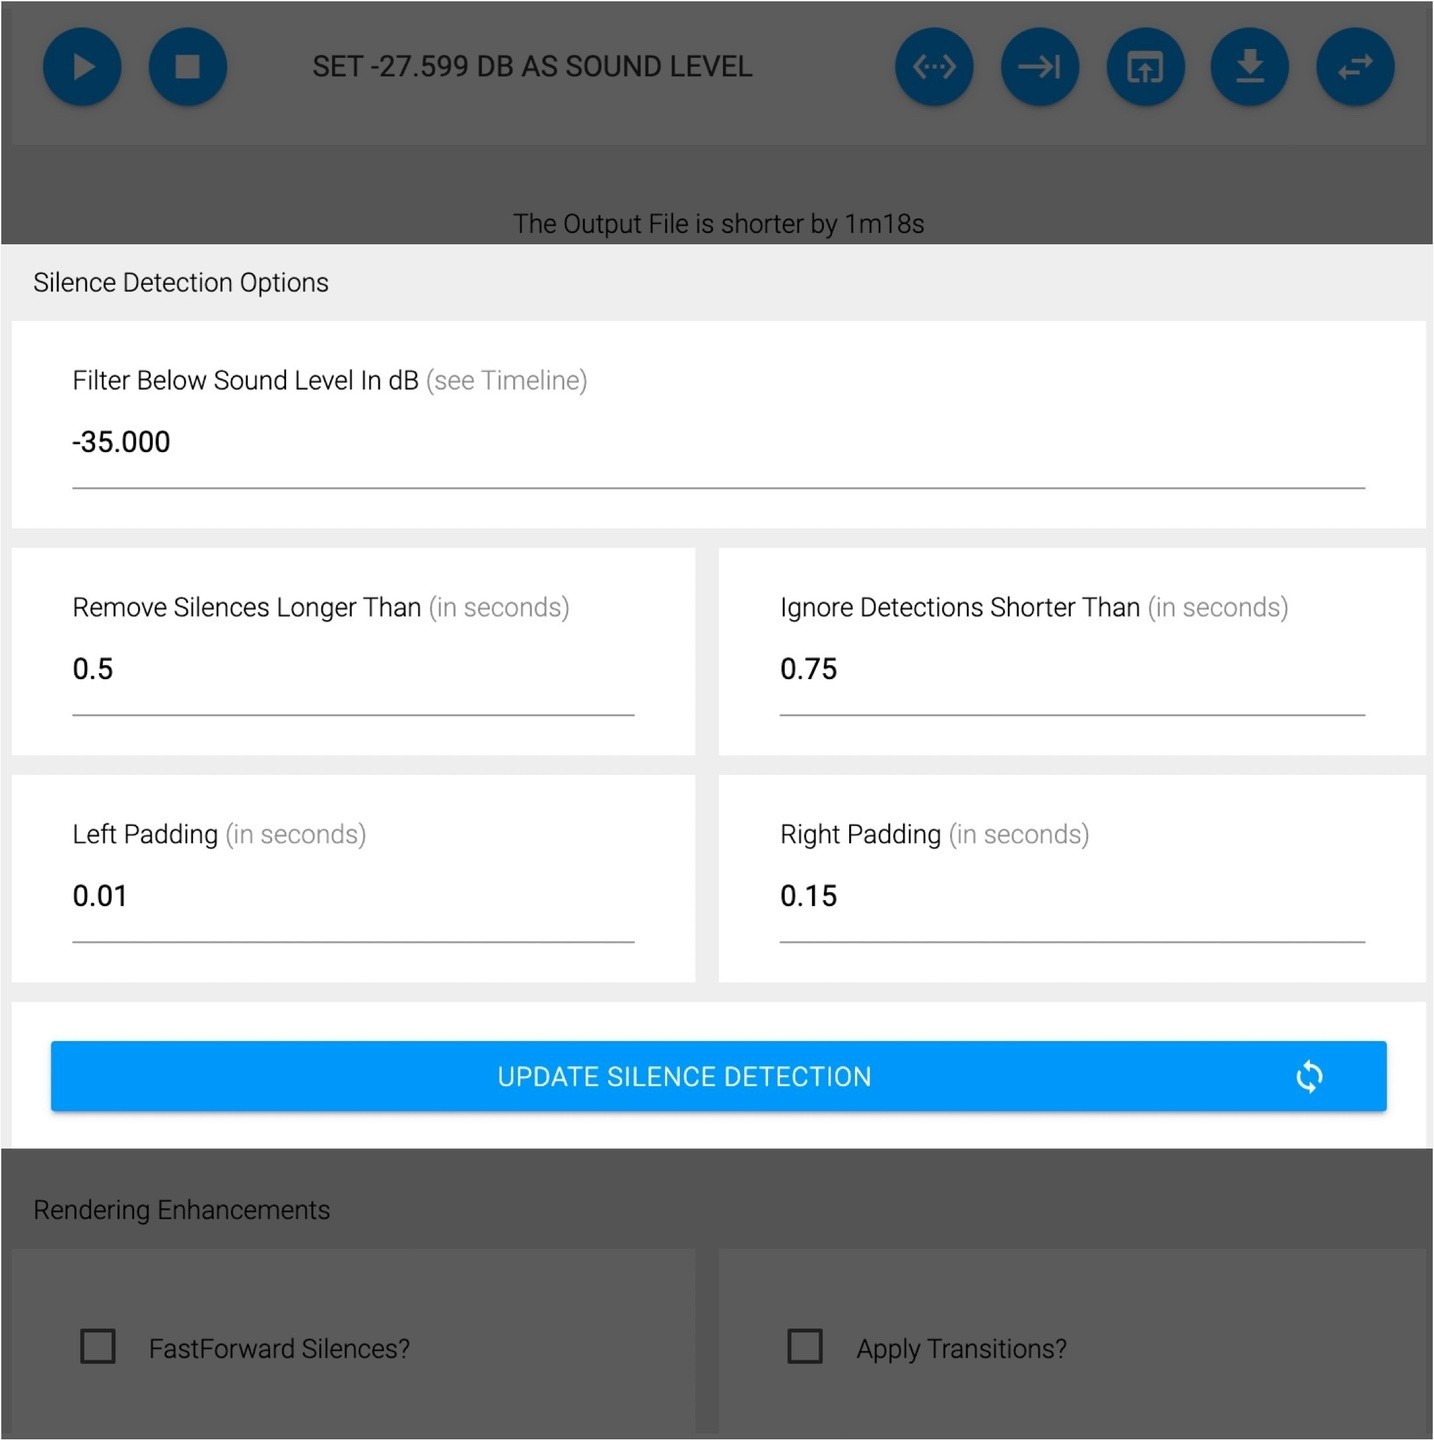
Get Settings Right
DB level set from -30 to -40db. Almost always.
Remove silences longer than .2 to .5 sec
Ignore detections keep at .75 sec to cut random noise.
Left Pad .01 - .15 sec
Right Pad .12 - .15 sec always to prevent cutoff of long 's' / 'p' sounds.
2
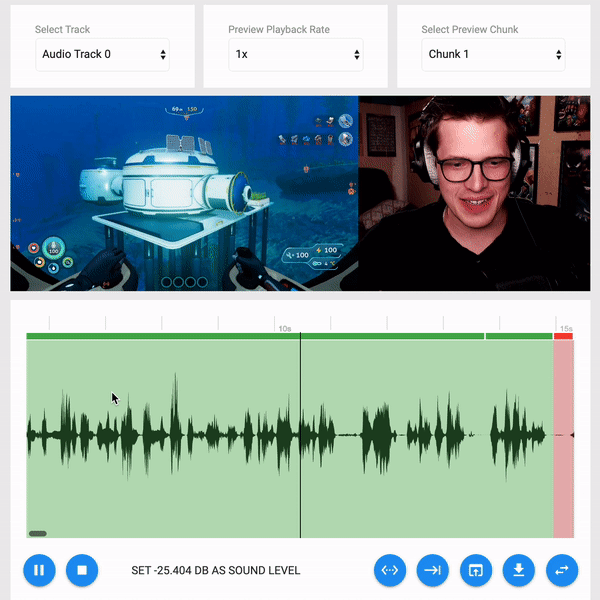
Cut or keep any scene or word
Click ‘L’ to start / speed up the playhead.
Click ’O’ to turn scenes on / off
Click ’S’ to split the timeline
NOTHING IS FASTER

3
Select Export XML.
4
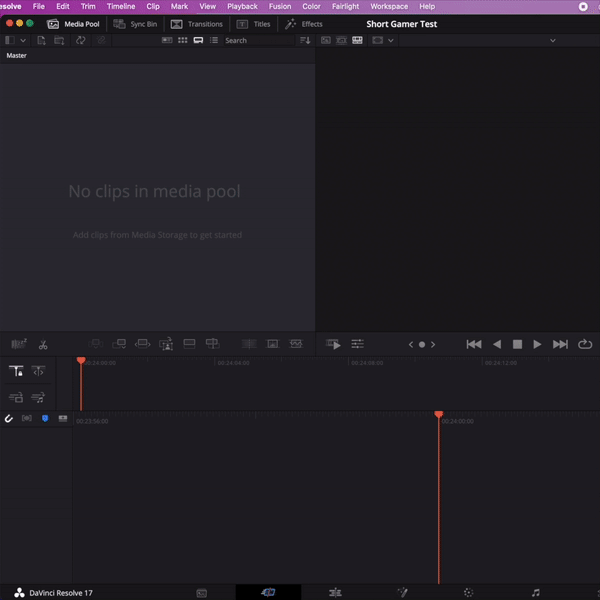
Import XML file into Resolve.
- Add raw source file
- Right click ‘Clip Attributes’. Make sure FPS is same as project FPS shown in saved TimeBolt file.
- File —> Import —> Timeline
- Uncheck ‘Auto import source clips into media pool’
- Change ‘Mixed Frame Rate Format’ to ‘Resolve’

5 (optional)
Enable additional tracks in Resolve if you capture multi-track audio.
Edit Multi-Cam Video Tutorial
